Monday, April 28, 2014

Wear Pink! Breast Cancer Awareness

Last week, I saw a dotticure on pinterest that I really wanted to try out. It was in black and white, but I wanted to use my UV nail polish that turns purple and with a pink polish for the dots. I was planning it out to do on Friday, when I realised that I should really paint my nails in support of those undergoing breast cancer.

My aunt was diagnosed with breast cancer a few weeks back and on Thursday she underwent surgery. We went down to visit family on Saturday, so we went to see her at my other aunt's house. She is doing great. If I didn't know that she had cancer and just underwent surgery a couple days before, I never would have guessed!

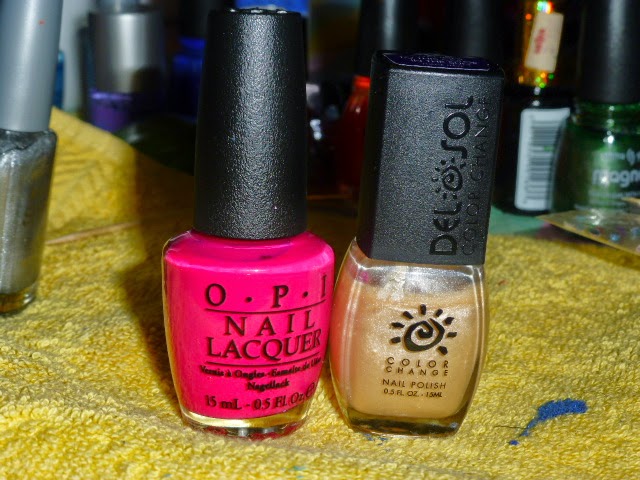
Here are a few pictures of my manicure for breast cancer awareness. The polishes that I used were Purple Haze from Del Sol and Koala Bear-y from OPI. The UV didn't change it as much as I thought it would because I put on drying drops without thinking about the fact that it would mean that less UV got through to my nails. They ended up turning a more silvery purple than how they show up without the drying drops.


I realise I am posting this before the week for the dotticure in the challenge, but I wanted to share it now. I may do another dotticure later this week, but I wanted to keep this one for longer than I keep most of my manicures since it's in support of a good cause.

Thursday, April 24, 2014

Diamonds are a girl's best friend!

This week's theme for NAILS is Diamonds because the diamond is the birthstone of April. Yesterday, I decided to do my take on something that I've seen online that woman have done for their wedding nails. I decided to make a diamond ring on my ring finger nail.

I started by painting my nails with Cozu-melted in the Sun by OPI. After two coats, you could still see the nail line. I hate VNL, so I decided to try to do a French manicure. I always get a French when I get my nails professionally done, but this was the first time that I had done them myself.


I had seen online that there are a few tricks to getting perfect tips for French manicures at home. The two most common ones that I've seen are using the round edge of a bandaid and using reinforcement labels. I found some in the study room in our house, so I went with those since we don't have as many spare bandaids.

I put them on my nails and then painted the white tips, trying to be careful not to get any white in the hole!


When I took the labels off, I wasn't too happy with my nails. The labels were too small for my fingernails, so the edge ended up being thicker than the tip, as you might be able to see with the thumb since the gap is more visible. I ended up doing some touch-up free-hand. I didn't even both with the labels on my right hand and I think they turned out better.

Then I added a stripe of silver on my ring finger nail and put on a bejeweled jewel thing, that I found down in my mom's sewing room from probably 30 years ago, to be the diamond.

By no means were they perfect and I had to touch up the white more than a few times, but overall I'm pretty happy with how my first French manicure attempt worked out. I definitely learned some things, like it's better to just try to do the tips free-hand, but hey! Life's about learning!


 These are my cleaned-up nails today.


Monday, April 21, 2014

Easter Part 4: Freestyle

Don't get me wrong, I love chocolate and candies, but as a Christian, I don't want to forget the true meaning of Easter! For this reason, I chose to go with a Jesus/Christian theme for my nails on this freestyle day.


My thumb is a cross with yellow marks to signify that it is holy and he has risen.

My index finger says INRI, which was on the crucifix above Jesus and means Jesus of Nazareth, King of the Jews.

My middle finger represents the three crosses of Jesus and the two sinners.

My ring finger says Risen Jesus.

My pinkie is a crown because Jesus is King!


Saturday, April 19, 2014

Easter Part 3: Spring Flowers

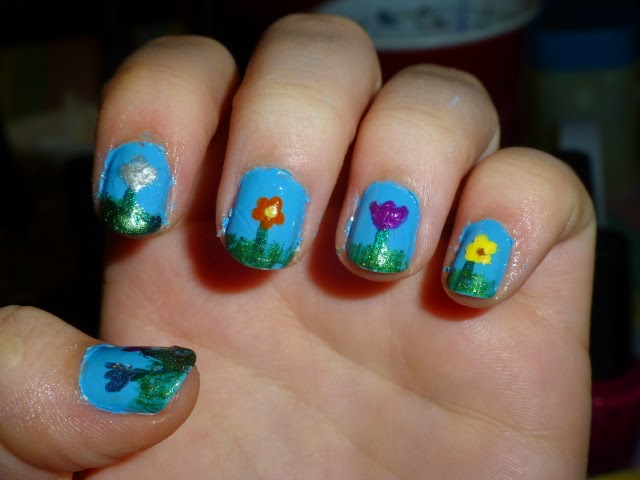
I decided to go with my pastel blue for the background of my nails to give a sky effect. I wanted to give a little bit of a cloud effect by painting white over top and using Saran wrap to remove it, which leaves parts of it behind. As you can see from the pictures, it didn't work as planned. I guess that the blue wasn't as dry as I thought that it was and it ended up taking off most of the blue and made a big mess. Luckily I had only tried it on my left hand and just had to redo those.


Once I fixed up the background, I grabbed one of my greens and made a stem (or two) on each fingernail. Then I used my fan brush and combined my bright green, my dark green, and my glitter green (Winter Holly by China Glaze) and I fanned some grass onto the tips. I chose to mix the greens for the grass to give it a little more dimension.


The next part was drawing on the flowers. I did a combination of tulips and daisies, so I used a small brush and a dotting tool. I had lots of different colours and decided to take a picture of all the different nail polishes used to make this manicure. It was a lot.


I was really happy with the end product, that is until I showered. Some of my nails, mostly on the left hand got a bit messed up, as you can see in the first picture. (The other two are the finished product, or at least what it looks like as of now because I need to go to bed and I have no time to fix them better.) I guess my nails weren't completely dry yet! I used one of my brushes to touch up where the nail polish smeared or came off and I'm not too upset with the final product, although it's clearly not my best work. I will be busy all day tomorrow, so I'm posting this tonight even though my nails aren't as cleaned up as I'd like. Hopefully I can get some better pictures tomorrow (and in daylight since the flower on my left index finger is a UV changing polish and goes purple in the sun!)


Friday, April 18, 2014

Easter part 2: Pastels

So I did a bit of cheating for this one. Or you could just call it smart. I did some skittle nails for today's design, but I actually did them a couple of days ago. Why? Well because they were the base colours of yesterday's manicure. I don't have a lot of options for pastels in my collection, so these were the best I got. My pinky is the temperature changing one, but I thought that the purple looked better with the rest of the nails since the blue was almost the same shade as my thumb.


Easter part 1: Eggs

Since I'm doing two challenges (NAIL link up and the Challenge Your Nail Art on facebook) I'm going to be double dipping. The theme for the whole week for NAIL is Easter and the Challenge Your Nail Art has four themes for today through Sunday. Today's theme for Challenge Your Nail Art is Easter Eggs.

I decided that rather than have all of my nails be eggs, I've made my middle nail be the Easter bunny and my thumb a basket of eggs. The background of my pinky nail is the temperature colour change nail polish. I like it better when it was purple, but it was hard to get it cold long enough for the picture. I had to put my nail under cold water to get it to change and I didn't have time to wipe off the excess water because it would change back to blue in the time it took to do that.


Wednesday, April 16, 2014

U of M Men's Gymnastics

Last Thursday, Friday, and Saturday were the National Championships for NCAA Men's Gymnastics. (Michigan won as well as having the All-around winner!) They were held at the University of Michigan and my oldest sister is obsessed with gymnastics, so she came up from North Carolina. She, my parents, and I went to the Thursday night events and my other sister and her daughter joined us on Friday. We didn't end up going on Saturday.

I wanted to paint my nails Michigan colours and I decided to do a marbling. I was going to do other designs on my mom and oldest sister, but they didn't end up having time for me to paint their nails before.

Since the University of Michigan's colours are blue and yellow, I wanted to do a test marble to make sure that it didn't end up green. I took a piece of plastic from a baggie and I painted the blue and yellow that I was going to use as well as a white. This was to see what colour would look best as the base colour. Then I did a marbling on the water and put the plastic on top to take it up. The blue and yellow didn't create green when they were in the cup, but they did create green when they were used as the base colour. I decided that the white looked much better. (The white is on the upper left, blue on upper right, and yellow on lower right)


 So I painted my nails white and let that dry before doing the marble. Before I had the marbling on them, they reminded me of when I was in elementary school and people would paint white-out on their nails during class!


This was the last marbling that I did. I liked how it turned out a lot better than my other ones. Instead of putting the paints in like one big target, I decided to do a few smaller targets. The colours looked a lot better as they alternated better when mixed. The other way had bigger patches of blue and yellow.


I had a lot more issues with this marbling than I had last time. For some reason, the polish wasn't spreading as well and I could only get a couple nails at once instead of being able to do one hand at a time. For this reason, my thumb and pinkie got really messed up.


I wasn't too happy with how they turned out and I forgot to take a picture when they were cleaned up a little better as a result. I was originally going to redo them for Friday night, but I ended up not having time, so I just kept these for a few days.

Tuesday, April 8, 2014

For the birds!

Week 2 of April's challenge for the NAIL link-up is 'Birds.' Apparently tomorrow is officially "draw a picture of a bird day." I looked up some nails last week and decided a long branch that spanned my nails and each one had a bird on it.

First I painted my nails white. Then I painted some bird sillouettes in different colours. I forgot to take a picture of left hand before I added the branch, so I took one of my right hand.


I then painted the branch along my nails so that they looked like they were perched. I also included some twigs. My index finger has a little bit of the brown on the side and I painted part of my thumbnail brown so that it would be like part of the trunk.


I then added some black to the wood to make it more tree-like, including a "hole" in the branch.


The final cleaned up project! I'm pretty happy with how they turned out. The green and pink one have some UV nail polish on their stomachs, but it was too cloudy and rainy today to see how the colour changed.


Thursday, April 3, 2014

April Showers

I found another nail art challenge the other day that has them set up for each month with a new theme every week. This week is Rain/April Showers.

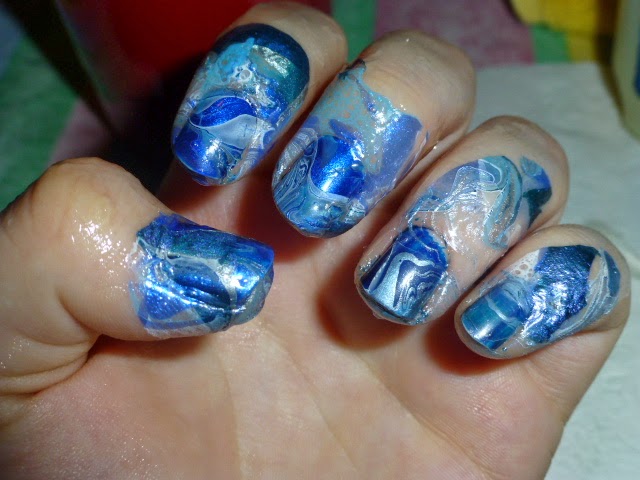
I decided that I wanted to do a blue water marble for the background of my nails so that it would look like storm clouds. I used various shades of blue, silver, and white. I then put one umbrella on each hand.


I used this small cheap blue nail polish for the base colour. It doesn't cover well and it takes a ridiculous amount of strokes to get even a bit of coverage. (My mom actually thought that it was already marbleized when I showed her it this morning.) Since I was going to do water marbling, though, I didn't care too much about it being streaky or having lots of clean up since I knew that it would only get worse. I painted this part last night, so most of the excess fell off by the morning.


I decided to use Vaseline on my fingers to keep the nail polish just on my nail and make clean-up a little easier. Last time I used Vaseline, I just put it on with my finger and it was a huge mess, just a different kind. This time I used a Q-tip to keep it where I wanted it instead of all over.


 This is what the marbling looked like when it was all done.

 The Vaseline made clean-up so easy! The excess nail polish is just like another layer by itself. I just used the side of a toothpick to wipe it off of my finger. I tried to capture the ease of cleaning with this picture.


 Then I drew in an umbrella on my finger. I was pretty happy with how the outline turned out, but then it got worse.

I tried to make it orange, but the orange nail polish was just running and making a mess. I decided to try to put red on it instead. That looked better, but it was still a mess from the orange. I also decided that the black handle was sort of hard to see, so I changed it to the brown that I just got about a week ago and haven't used yet.


 The polishes that I used for the umbrella and marbling. I used just the silvery-blue of the dual-polish.


EDIT: At work today, one girl tried to take off my nail polish saying that it was "just a sticker." She didn't believe that I could actually do marblizeing with nail polish!